
Build a sequence with several points
Use the plus control to create a marker for each action, then drag the centers to their intended positions. A three-point sequence runs target 1, target 2, and target 3 before returning to target 1 for the next cycle. Each point can have its own delay and click type.
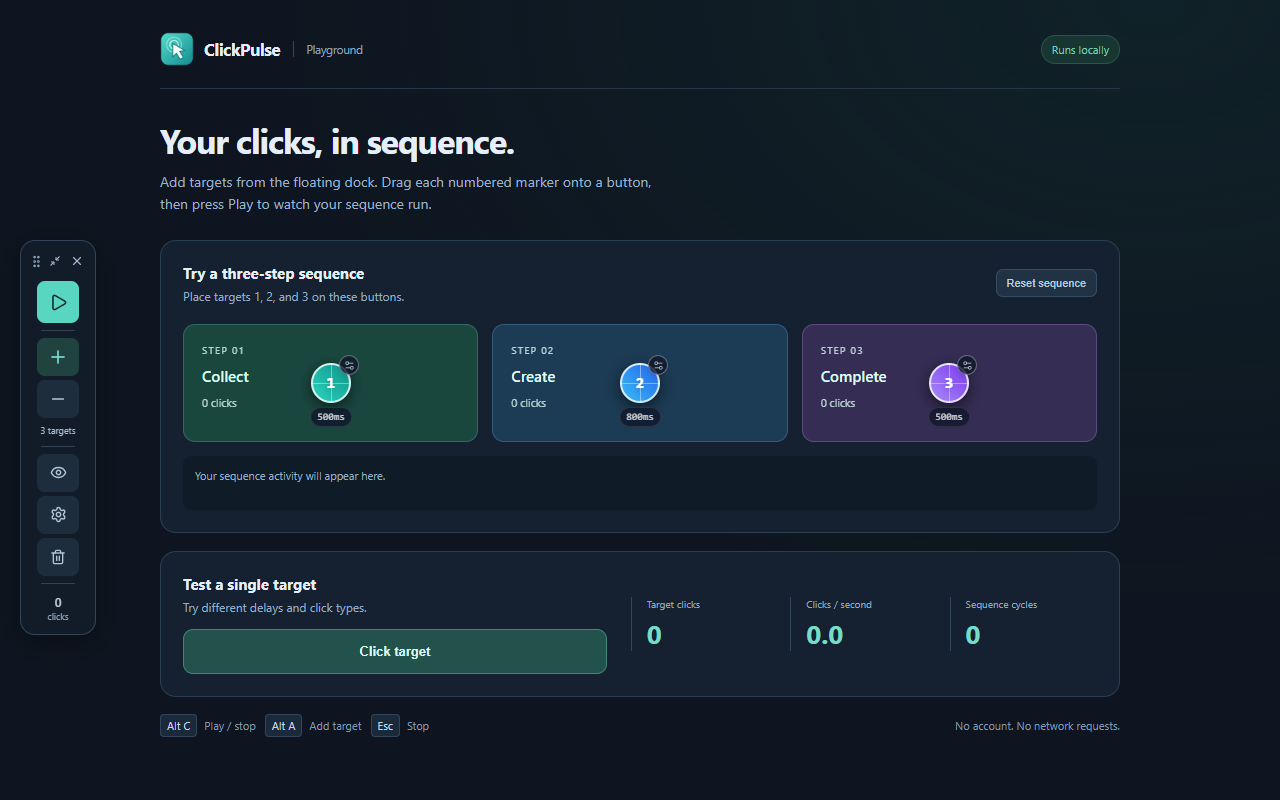
Example: repeat a three-button test
In the playground, place target 1 on Collect, target 2 on Create, and target 3 on Complete. Keep all three as single clicks with 500 ms delays and select 2 repeat cycles. Each button should receive 2 clicks. Check the counters before using the same pattern on your own interface.
Sequential clicks and independent timers
AutoClicker follows one ordered sequence. It does not run every point simultaneously on an independent schedule. This makes the order visible, but it also means that a slow step can affect the complete cycle. Give the page time to finish each action before the next point runs.
Keep targets aligned
Markers use positions in the visible page. A menu opening, a panel resizing, or a page scrolling can change the button beneath a point. Stop the sequence, reposition the markers, and run one cycle again. If an action navigates to a different page, set up and verify the sequence for that destination separately.
Choose a repeat limit
Use a small fixed repeat count while testing. A repeat count is a number of complete cycles, rather than a separate count for each marker. A double-click point produces two click events on each visit, so the click counter can differ from the number of target visits.
Read the delay and repeat guide and the click type reference to refine your sequence.